TM 9-2350-261-34
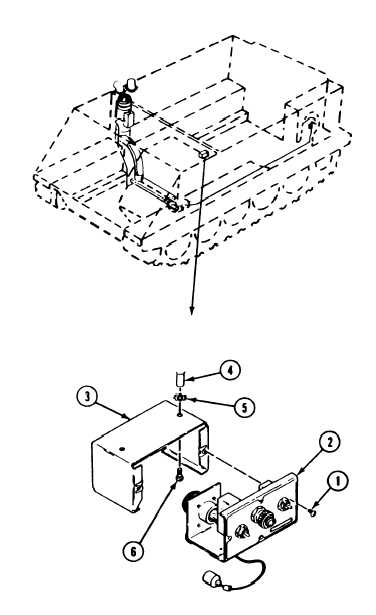
51. Remove two screws (1) and control box (2)
54. Secure control box (2) to control box case (3)
from control box case (3).
with two screws (1).
52. Remove two screws, nuts, and washers
55. Clean small area on transverse beam next
supplied with control box case (3). Discard
to control box (2) and apply warning decal
screws, nuts, and washers.
(see your –20).
53. Secure control box case (3) to two
weldnuts (4) with two lockwashers (5) and
screws (6).
GO TO NEXT PAGE
11-23