TM 9-2350-277-20-5
REPLACE FRONT ARMOR (M113A3 ONLY) — Continued
0749 00
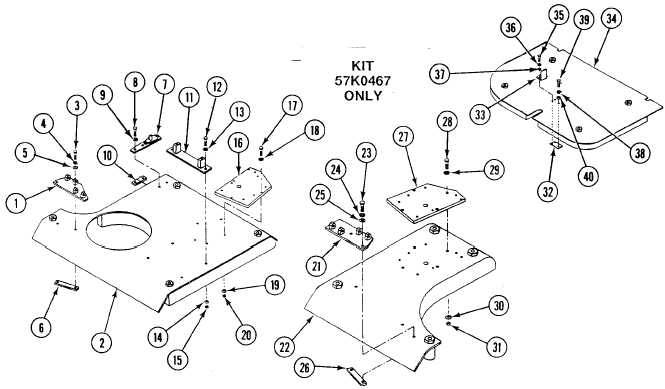
10. Insert detent screw (39) with nut (38). Installed, through washer (40) and door plate (34) into backing plate (32) until
threads of detent screw (39) bottom out. Do not tighten detent screw (39) or jam nut (38) yet.
WARNING
Armor plates are heavy. Be sure to support plate properly to avoid injury to personnel.
11. Install trim vane hinge (1) on front left armor plate (2) with two screws (3), new lockwashers (4), and washers (5).
12. Install trim vane strike (6) on front left armor plate (2) with two screws (7), new lockwashers (8), and washers (9).
13. Install two track shoe brackets (10) on front left armor plate (2) with four screws (11), new lockwashers (12), and
washers (13).
14. Install bracket (14) on front left armor plate (2) with four screws (15), new lockwashers (16), and washers (17).
15. Install trim vane hinge (18) on front right armor plate (19) with two screws (20), new lockwashers (21), and washers (22).
16. Install bracket (23) on front right armor plate (19) with four screws (24), new lockwashers (25), and washers (26).
17. Install latch stop (27) on power plant door armor plate (28) with two screws (29), new lockwashers (30), and
washers (31).
18. Thread jam nut (32) on detent screw (33) to end of threads.
0749 00-9