TM 9-2350-261-34
14.
15.
16.
17.
18.
19.
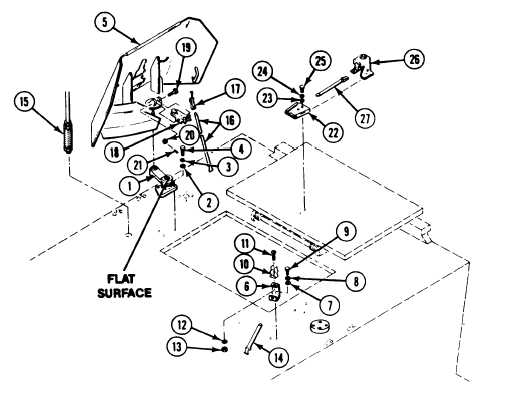
Place two mounting arms (1) on top deck
with flat surface of mount parallel to side of
hull. Loosen mounting screw and rotate
mount, as needed. Secure with six flat
washers (2), lock washers (3), and cap
screws (4).
Place armor shield (5) in left and right
mounting arm (1).
Place two brackets (6) on top deck. Secure
with four flat washers (7), lock washers (8),
and cap screws (9).
Place clips (10) on left and right
brackets (6). Secure with four machine
screws (11), flat washers (12), and self-
locking nuts (13).
Install straps (14) on left and right
brackets (6).
Install two restrictors (15) on top deck.
20.
21.
22.
23.
Insert four shield retaining straps (16)
through loops under each side of both
shields (5). Install clamps (17) on each
strap (16). Connect clamps to loops on
shields. Tighten straps to secure shields.
Place 7.62 mm platforms or caliber .50
adapters (18) on left and right shields (5).
Secure with two bolts (19), nuts (20), and
cotter pins (21). Stow unused platforms or
adapters (18) in carrier tool bag
(see your –10 for stowage).
Place plates (22) on cargo cover and on
inside rear hull plate. Secure with four flat
washers (23), four new lock washers (24),
and four screws (25).
Place pintle socket (26) on one of the two
plates (22). Secure with strap (27). Lace
strap through loop on plate and around the
round bar of the pintle socket. Secure strap.
END OF TASK
20-8