TM9-2350-261-34
6. Repair punctures, cuts and abrasions as
follows:
a.
b.
c.
d.
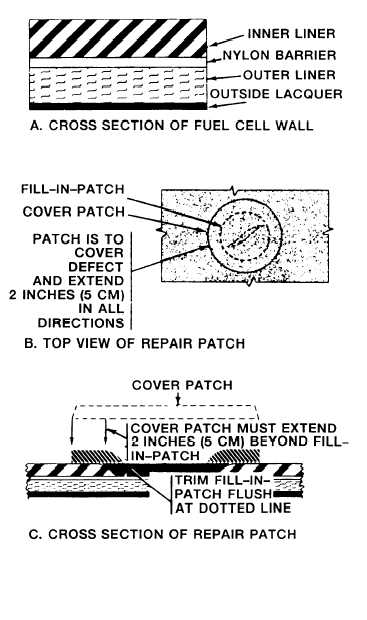
Place bladder on table or bench with flat,
smooth, clean surface.
Measure area to be repaired. Cut a repair
patch 2 inches (5cm) larger than
measured area.
Round off corners and taper edges of
repair patch.
The dull or stock side goes next to the
bladder.
W A R N I N G
Dry
cleaning
solvent
P - D - 6 8 0 i s
toxic
and
flammable. Always use in
an open area with good air
flow, away from sparks,
h e a t o r
flames.
Wear
goggles and gloves. Do not breathe
vapors. Avoid contact with skin, eyes and
clothes. If you get dizzy while using
solvent, breathe fresh air and get medical
help. If solvent gets on hands, wash them.
If solvent gets in eyes, flush eyes with
fresh water and get medical help
immediately.
Keep fire extinguisher
nearby.
e. Clean repair patch with a clean cloth and
dry cleaning solvent.
C A U T I ON
Place a sheet of cellophane on inside of
bladder, under area to be repaired, to
prevent bladder from being bonded
together.
N O T E
Mix cement well before using.
f. Mix 1 ounce (28 grams) of accelerator
with 1/2 pint (0.236 liter) of cement in a
clean container with at least 1 pint
(0.473 liter) or more capacity.
N O T E
Do not use cement mix over 25 minutes
old. Mix a second batch, if needed.
g.
h.
i.
J
k.
l.
Apply an evenly brushed layer of cement
to bladder and repair patch.
Allow first layer of cement to dry for
20 minutes.
Apply a second layer of cement. Position
repair patch on repair area of bladder.
With stitcher supplied with repair kit,
work from the center of repair patch to
smooth out air bubbles.
Cover the repair patch with cellophane.
Place cloth backed foam rubber with cloth
side up over cellophane.
GO TO NEXT PAGE
4-17


