TM9-2350-261-34
cleaning. Purge air from fuel tank with
CO2.
R E P A I R
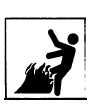
W A R N I NG
Fuel fumes can explode and
burn you. Before welding:
Drain all fuel. Disconnect
and cap all fuel and vent
lines. Purge fuel residue
and
f u m e s b y
steam
4.
5.
6.
7.
8.
9.
Secure screws with lockwire.
Apply a layer of sealing compound
1/8-1/4 inch (3-6 mm) thick. Extend seal
about 1 inch ( 3 cm) on both sides of crack
and over screw heads.
Allow sealing compound to set 40 hours at
72°F (22°C) if class B2 is used and 48
hours if class B4 is used.
N O T E
Drill and tap a 3/8 x 16 UNC-2A (10 mm)
To speed sealant setting time, use an
deep hole at each end of crack.
electrical gun type heater. Do not exceed
200°F (93°C).
If crack is longer than 1-1/2 inches (4 cm),
space holes about 1-1/2 inches (4 cm) apart
along centerline of crack.
Install new 3/8 x 16 UNC-2A (10 mm)
screws in drilled and tapped holes. Tighten
screws to 144-180 in-lb (16-20 N-m) torque.
Use torque wrench.
FOLLOW-THROUGH STEPS
1. Install fuel quantity sending unit
4.
(see your -20).
5.
2. Install fuel filler assembly (see your -20).
6.
3. Install fuel supply and return hoses and
fittings (see your -20).
7.
Fill fuel compartment
Check for fuel leaks.
(see your -10).
Raise and lock ramp (see your -10).
Stop engine (see your –10).
END OF TASK
4-13