TM 9-2350-261-34
R E P A I R F U E L T A N K ( M 5 7 7 A 2 A N D M 1 0 6 8 O N L Y)
I
DESCRIPTION
This task covers:
Clean (page 4-14).
Repair (page 4-15).
INITIAL SETUP
T o o k
Metal Worker’s Tool Kit (Item 61, App B)
Trailer-Mounted Welding Shop
(Item 96, App B)
Materials/Parts:
Sealing compound (Item 73, App C)
wiping rag (Item 86, App C
Personnel Required:
Metal Worker 44B10
References:
See your -10
See your -20
TM 9-237
Equipment Conditions
Fuel tank removed from carrier (see your -20)
Fuel tank access cover removed (see your -20)
Fuel quantity sending unit removed
(see your -20)
C L E A N
1.
W A R N I NG
Fuel fumes can explode and
burn you. Before weding:
Drain all fuel. Disconnect
2.
and cap all fuel and vent
lines. Purge fuel residue
and
f u m e s b y
steam
cleaning. Purge air from fuel tank with
3.
C 0 2.
Use a wire brush to remove paint and dirt
from outer surface area to be welded.
W A R N I N G
Air pressure in excess of 30
psi (207 kpa) can injure per-
sonnel Do not direct pres-
surized air at yourself or
others. Always wear gog-
gles.
C A U T I O N
Do not expose sealed areas to steam for
more than 15 minutes, as existing seal will
begin to deteriorate.
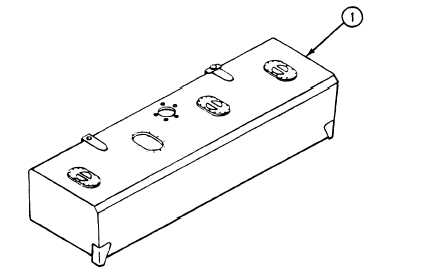
Steam clean inside of fuel tank (1). Use clean
rags and 30 psi (207 kPa) compressed air to
d r y
Direct carbon dioxide or argon gas into fuel
tank (1) at 30-60 cubic feet (0.84-1.68 cubic
meters) per hour until gas escapes from
access cover openings.
4-14
Change 3