TM 9-2350-261-34
R E P A I R R A D I A T O R A U X I L I A R Y T A NK
INITIAL SETUP
Tools:
References:
Metal Worker’s Tool Kit (Item 61, App B)
See your -20
Degreaser (Item 22, App B)
TM 43-0139
Radiator Test Plug Set (Item 75, App B)
TM 9-237
Radiator Test Stand (Item 91, App B)
Equipment Conditions:
Personnel Required:
Radiator auxiliary tank removed from carrier
Metal Worker 44B10
(see your -20)
REPAIR
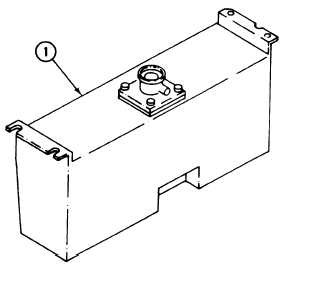
1. Degrease tank ( 1). Use degreaser.
3.
4.
WARNING
Do not exceed 20 psi (137
kPa) pressure while testing
auxiliary tank. Ensure aux-
iliary tank is submerged be-
fore applying air pressure.
Do not direct pressurized
air at yourself or others. Always wear
goggles.
Attach tank (1) to radiator test stand.
NOTE
There are two ways to pressure test tank.
If using water pressure, do step 3, then go
to step 5. If using air pressure, go to
step 4.
Apply internal water pressure of 18–20 psi
for minimum of 3 minutes. Check for water
leaks.
Submerge tank (1) in
3 minutes. Check for
water and apply
for minimum of
air leaks.
NOTE
Mark areas of leaks and remove all plugs
before welding.
5.
6
7.
Weld areas of leaks in accordance with
TM 9–237. Weld all sizes to minimum
requirement for lead repair.
Repeat step 3 or 4 after welding.
Refinish tank
TM 43-0139.
(1) in accordance with
FOLLOW-THROUGH STEPS
1. Install radiator auxiliary tank (see your –20).
END OF TASK
5-5
2.
pressure of 18-20 psi