TM 9-2350-261-20-1
R E P L A C E F U E L C O M P A R T M E N T B L A D D E R ( M 7 4 1 A 1 O N L Y)
DESCRIPTION
This task covers:
Remove (page 6-94).
Clean, Inspect, and Repair (page 6-95).
Install (page 6-96).
INITIAL SETUP
Tools:
General Mechanics Tool Kit (Item 30, App D)
Materials/Parts:
Nonelectrical wire (Item 31, App C)
Sealing compound (Item 46, App C)
Sealing compound (Item 52, App C)
Cotter pin (2)
Gasket
Lockwasher (4)
Personnel Required:
Unit Mechanic
References:
see your -10
Equipment Conditions:
Engine stopped/shutdown (see your -10)
Battery ground lead disconnected (page 13-2)
Fuel bladder drained (page 6-88)
Filler cover and lock removed (page 6-7)
Filler cap and strainer parts removed
(page 6-89)
Fuel compartment access cover removed
(page 6-91)
Fuel bladder filler flange removed” (page 6-92)
Fuel quantity transmitter removed
(page 6-93)
REMOVE
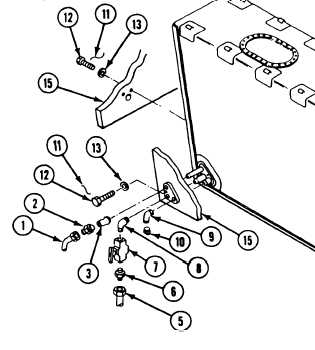
3. Remove elbow (9) and pipe plug (10) from
bladder (4).
1. Remove fuel return hose (1), adapter (2), and
elbow (3) from bladder (4).
4. Remove lockwire (11) from eight screws (12).
Discard lockwire.
2. Remove fuel supply hose (5), adapter (6),
shutoff valve (7), and elbow (8) from
bladder (4).
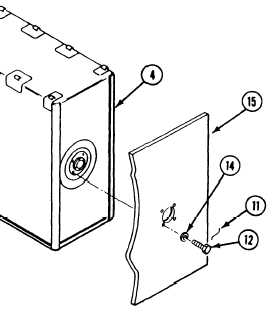
5. Remove eight screws (12), four flat washers
(13), and lockwashers (14) that secure
bladder (4) to compartment (15). Discard
lockwashers.
6-94