TM 9-2350-261-20-1
D R A I N F U E L B L A D D E R ( M 7 4 1 A 1 O N L Y)
I N I T I A L S E T U P
Tools:
References:
General Mechanics Tool Kit (Item 30, App D)
see your -10
Materials/Parts:
Equipment Conditions:
Sealing Compound (Item 46, App C)
Engine stopped (see your -10)
Wiping rag (Item 61, App C)
Carrier blocked (see your -10)
Suitable size container
Battery ground lead disconnected (page 13-2)
Personnel Required:
Unit Mechanic
D R A I N
1. Open fuel filler combat cover (1). Remove fuel
filler cap (see your -10).
N O T E
Fuel tank capacity is 95 gallons.
2.
3.
4.
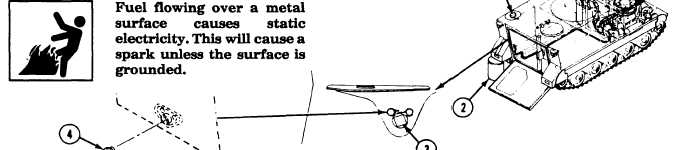
Place a suitable container (2) behind left rear
fender.
Make sure metal container (2) is making
metal-to-metal contact with carrier so that
there is a good ground.
Remove drain plug (3) from fuel
compartment.
WARNING
5.
6.
7.
8.
9.
N O T E
Use wiping rag to wipe up any spilled fuel.
Remove drain plug (4) from bladder through
fuel compartment drain opening. Drain fuel.
After fuel is drained, apply a thin, even coat
of sealing compound to clean threads of drain
plugs (3 and 4).
Install drain plug (4) in fuel bladder through
fuel compartment drain opening.
Install drain plug (3) in fuel compartment.
Install fuel filler cap (see your -10). Close
filler combat cover (1).
FOLLOW-THROUGH STEPS
1. After maintenance has been performed, fill
2. Connect battery ground lead (page 13-2).
fuel compartment (see your -10).
END OF TASK
6-88