TM 9-2350-287-20-1
6-6. RADIATOR AND MOUNTS REPLACEMENT (continued).
3.
4.
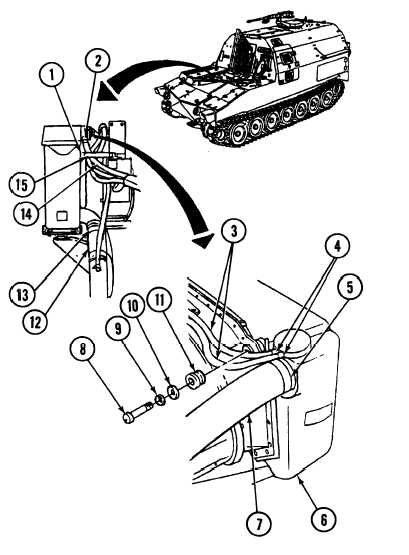
Install front mount (23) and eight screws (20), new Iockwashers (21), and washers (22) on transfer case.
Install two brackets (16) and four screws (19), new Iockwashers (1 8), and washers (17) on bottom of radiator
(6),
WARNING
5.
Radiator is very heavy. To prevent injury to personnel, two persons are required when
installing radiator in vehicle.
Position radiator (6) in place against radiator shroud.
6.
7.
8.
9.
10.
11.
WARNING
Adhesives can burn easily, can give off harmful vapors, and are harmful to skin and
clothing. To avoid injury or death, keep away from open fire and use in a well-
ventilated area. If adhesive gets on skin or clothing, wash immediately with soap and
water.
Apply adhesive to radiator inlet hose (7),
install radiator inlet hose (7) on radiator(6),
and tighten inlet hose clamp (5).
Apply adhesive to two radiator vent hoses
(3), install radiator vent hoses (3)on radiator
(6), and tighten two vent hose clamps (4).
Apply adhesive to radiator outlet hose (1 2),
install radiator outlet hose (12) on radiator
(6), and tighten outlet hose clamp (13).
Install two resilient mounts (11 ) on either
side of radiator (6) with two screws (8), new
Iockwashers (9), and washers (10).
Apply adhesive to hose (14), install hose
(14) on radiator (6), and tighten clamp (2).
Apply adhesive to hose (15), install hose
(15) on radiator (6), and tighten clamp(1).
FOLLOW-ON MAINTENANCE:
Install powerpack (para 3-2).
Refill cooling system (refer to TM 9-2350-287-10).
6-15