TM9-2350-261-34
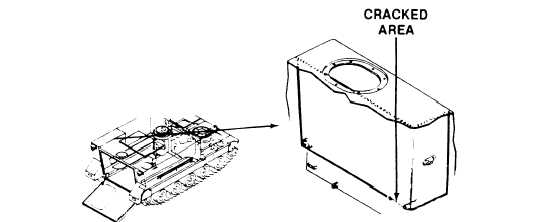
R E P A I R F U E L C O M P A R T M E N T W E L D J O I N T S ( M 1 2 5 A 2 , M 1 0 6 A 2,
A N D M 7 4 1 A 1 O N L Y)
DESCRIPTION
This task covers:
Clean (page 4–3).
Repair (page 4-4).
INITLAL SETUP
Tools:
General Mechanics Tool Kit {Item 35, App B)
Electrical Gun Type Heater (Item 41, App B)
Portable Electric Drill (Item 23, App B)
Screw Threading Set (Item 94, App B)
Tap and Die Set (Item 79, App B)
Twist Drill Set (Item 98, App B)
Torque Wrench (Item 117, App B)
Materials/Parts:
Non-electrical wire (Item 48, App C)
Wiping rags (Item 86, App C)
Fuel tank repair kit 2540-00-133-9593
Screw (8)
Personnel Required:
Track Vehicle Repairer 63H10
References:
See your -10
See your –20
References (cont):
Equipment Conditions:
Ramp lowered (see your –10)
Engine stopped (see your -10)
Carrier blocked (see your –10)
Fuel compartment drained (see your –20)
Fuel Filler assembly removed (see your -20)
Left taillight, leads, and guards removed
(see your –20)
Left taillight wiring harness and guard
removed (see your -20)
Fuel quantity sending unit removed
(see your -20)
Fuel supply and return hoses and fittings
removed (see your -20)
Rear main wiring harness and guard removed
(see your -20)
C L E A N
1.
2.
Use a wire brush to lightly buff existing
sealing compound surface on weld joints to be
repaired on inside of fuel compartment.
3.
Buff an area 1–1/2 inches (4 cm) wide on
both sides of weld joint centerline to be
repaired on outside of fuel compartment.
4.
W A R N I N G
Air pressure in excess of 30
psi (207 kPa) can injure per-
sonnel. Do not direct pres-
. .
surized air at yourself or
others. Always wear gog
gles.
C A U T I O N
Do not expose sealed areas to steam for
more than 15 minutes because existing
seal will begin to deteriorate.
Steam clean inner and outer surfaces of fuel
compartment.
Rinse fuel compartment with hot water. Use
clean rags and 30 psi (207 kPa) compressed
air to dry.
GO TO NEXT PAGE
4-3


