|
| |
TM 9-2350-287-34
9-2. UPPER REAR DOOR SMALL DOORS AND HINGE REPLACEMENT (continued).
a.
REMOVAL
NOTE
Perform steps 1 through 4 only if replacing threaded inserts.
1.
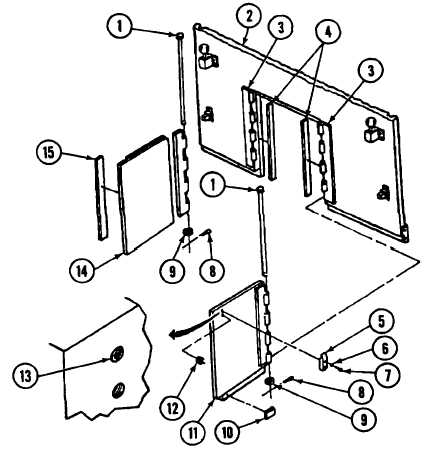
Remove two screws (7) and lockwashers (6) and strike (5) from each door (11 and 14). Discard lockwashers.
2.
Using electric drill and 19/32-inch twist drill, drill out material between threaded insert locking keys (13).
3.
Bend in and remove four threaded insert locking keys (13).
4.
Using screw extractor, remove threaded insert (12). Discard threaded insert.
NOTE
Perform steps 5 and 6 only if replacing hinge pins.
5.
Remove two cotter pins (8) and washers (9) from two hinge pins (1). Discard cotter pins.
6.
Remove two hinge pins (1) and small doors (11 and 14), with two hinge halves (3) attached, from upper rear door (2).
7.
Remove two seals (4) and two seals (10 and 15) from upper rear door small doors (11 and 14).
9-2
|