|
| |
TM 9-2350-287-20-2
15-25. LEFT CANISTER DOOR LATCH ASSEMBLY REPLACEMENT.
This Task Covers:
a. Removal
b. Disassembly
c. Cleaning and Inspection
d. Assembly
e. Installation
Initial Setup:
Tools/Test Equipment:
• Lockwasher (6) (Item 196, Appendix H)
• General mechanic’s tool kit (Item 24,
Appendix 1)
Equipment Conditions:
• vehicle parked on level ground (refer to
Materials/Parts:
TM 9-2350-287-10).
• Drycleaning solvent (Item 28, Appendix D)
• Left canister door opened and secured
• Lockwasher (4) (Item 164, Appendix H)
(refer to TM 9-2350-287-10).
a.
REMOVAL
1.
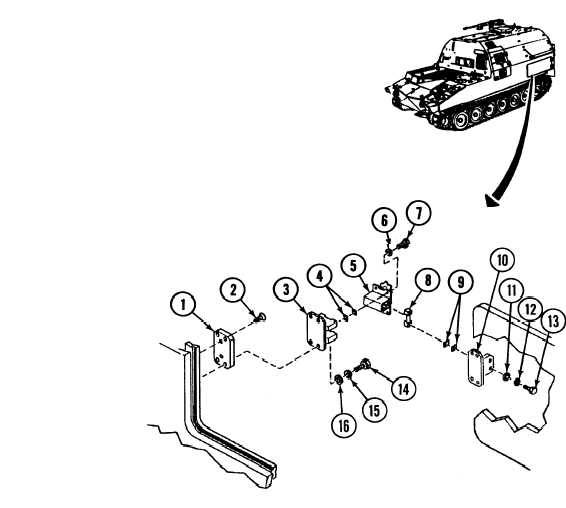
Remove four screws (14), Iockwashers (15), and washers (16) and plate
(3) from plate (l). Discard Iockwashers.
2.
b.
Remove two screws (2) and plate (1) from hull.
DISASSEMBLY
NOTE
For proper assembly, record the number and thickness of shims.
1.
Remove four screws (7) and Iockwashers (6), left canister door latch
assembly (5), and shims (4) from plate (3). Discard Iockwashers.
2.
Remove two screws (13), Iockwashers (12), and washers (11), shims
(9), and striker (8) from bracket (10). Discard Iockwashers.
15-57
|