|
| |
TM 9-2350-287-34
10-2. BILGE PUMP REPAIR (continued).
a.
1.
2.
3.
4.
5.
6.
7.
8.
9.
10-2
DISASSEMBLY
Match
Match
mark
mark
impeller cover (3) and impeller housing (19) to bilge pump (7).
impeller housing (19) to bilge pump (7).
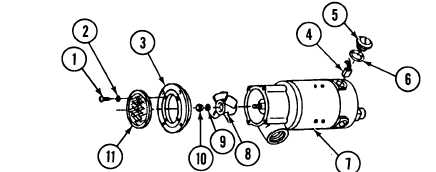
Remove four brush caps (5), preformed packings (6), and brushes (4) from bilge pump (7). Discard preformed
packings and brushes.
Remove four screws (1) and Iockwashers (2), inlet screen (11), and impeller cover (3) from bilge pump (7).
Discard Iockwashers.
Remove nut (10), Iockwasher (9), and impeller (8) from bilge pump (7). Discard Iockwasher.
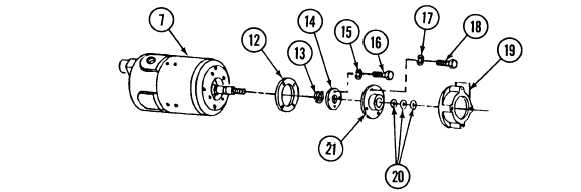
Pull impeller housing (19) from bilge pump (7).
Remove four screws (18) and Iockwashers (17), seal cover (21), and gasket (12) from bilge pump (7). Discard
Iockwashers and gasket.
Remove three shaft seals (20) from seal cover (21). Discard shaft seals.
WARNING
Snaprings are under spring tension and will snap out of position when removed. To avoid injury
to personnel, use care during removal.
Remove four screws (16) and Iockwashers (15), plate (14), and snapring (13) from bilge pump (7). Discard
Iockwashers and snapring.
|