|
| |
TM 9-2350-287-20-2
15-22. TOP MIDDLE DOOR REPAIR (continued).
.
2.
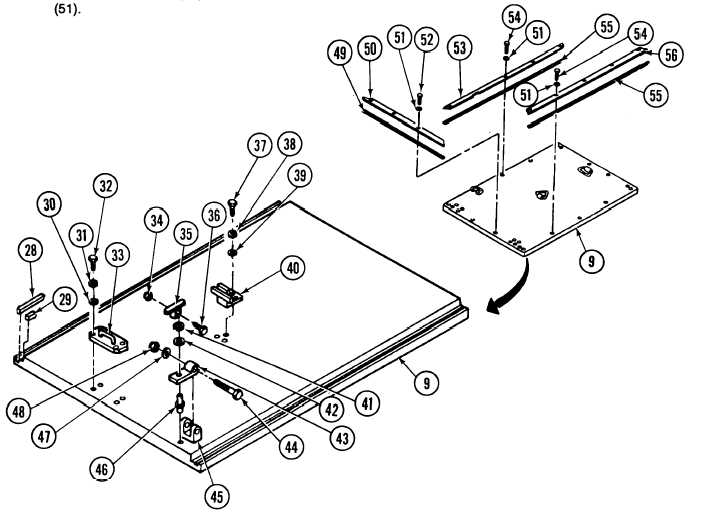
Install bracket (40) on door (9) with three washers (39), new Iockwashers (38), and screws (37).
3.
Install pin (46), three washers (42), new Iockwasher (41), and handle (35) on each of two latches (43) with
screw (36) and new self-locking nut (34).
4.
Install door latch (43) in each of two brackets (45) with screw (44), washer (47), and new self-locking nut (48).
Adhesives can bum easily, can give off harmful vapors, and are harmful to skin and
clothing. To avoid injury or death, keep away from open fire and use in a well-
ventilated area. if adhesive gets on skin or clothing, wash immediately with soap and
water.
5.
Apply adhesive to two seals (29 and 28). Allow to dry until tacky.
6.
Install two new seals (29 and 28) on door (9).
7.
Install two seals (49) and seal retainers (50) on door (9) with eight screws (52) and new Iockwashers (51).
8.
Install two outer seals (55) and seal retainers (53 and 56) on door (9) with 10 screws (54) and new Iockwashers
15-49
|