RECTIFIER: DISASSEMBLY, lNSPECTION AND REPAIR, AND ASSEMBLY (Continued)
C
A
B
DISASSEMBLY
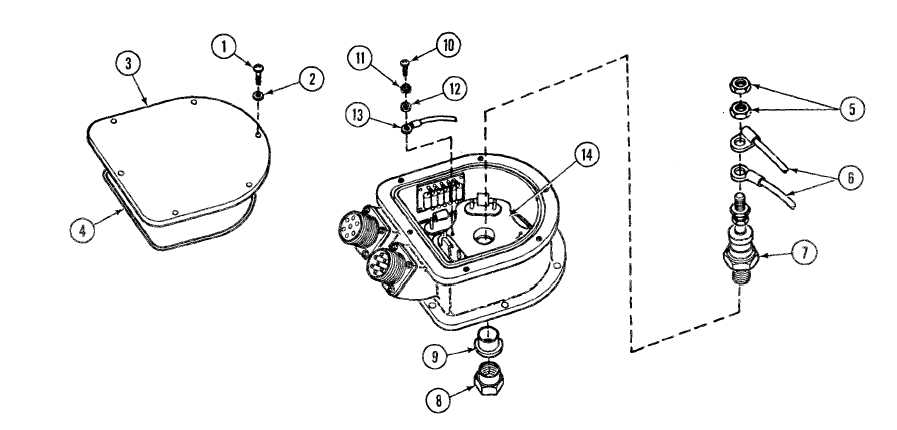
Remove six screws (1) and six flat washers (2).
Remove cover (3) and seal (4).
Remove two nuts (5).
D
Remove two eleetrical leads (6) (wire 2-J-2 and lead C-7) from semiconductor
CR-7 (7).
E
Remove one nut (8), bushing (9), and semiconductor CR-7 (7).
F
Remove one screw (10), serrated washer (11), flat washer (12), and lead C-
6 to E-3 (13) from heat sink (14).
6-27
C h a n g e 4
TM 9-2350-267-34