|
| |
TM 9-2350-287-20-2
10-2.
APU REPLACEMENT (continued).
6.
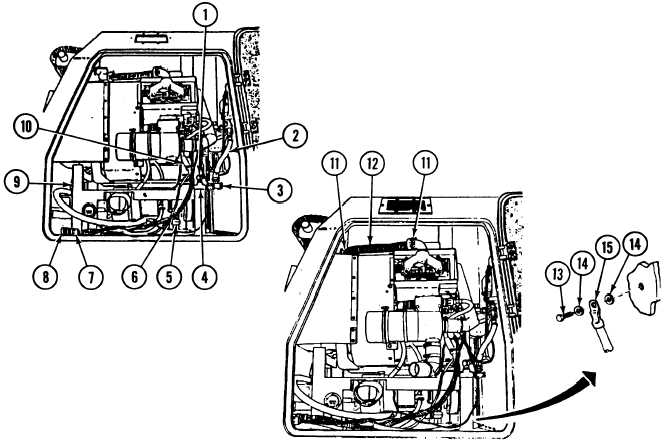
Install new gasket (hidden) and secure tube assembly (12) to exhaust outlet with two clamps (11).
7.
Connect ground lead (15) to bulkhead with screw (13) and two new Iockwashers (14).
8.
Connect hydraulic pump inlet hose coupling (6) to elbow (5).
9.
Connect hydraulic pressure line (1) to hydraulic T-connection (4).
10.
Connect hydraulic pump outlet hose coupling (2) to elbow (3).
11.
Connect two hydraulic pressure switch electrical connectors No. 61 (10) to APU.
12.
Connect two electrical wiring harness connectors (7 and 8) to APU compartment-wall connections.
13.
Start APU (refer to TM 9-2350-287-10). Check for hydraulic leaks.
FOLLOW-ON MAINTENANCE:
• Install APU plenum (para 18-17).
• Install APU panels (para 18-14).
• Close APU compartment side door (refer to TM 9-2350-287-10).
• Open hydraulic reservoir ball valve (refer to TM 9-2350-287-10).
• Install APU compartment access plate (para 15-39).
• Connect battery ground cables (para 7-41).
18-7
|