TRACK SHOES: REMOVAL AND INSTALLATION
INITIAL SETUP
Test Equipment/Special Tools:
Fixture, track connecting (item 7, Appx B)
General mechanic’s tool kit (item 52, Appx B)
Puller, end connector track (item 13, Appx B)
Wrench, torque 1/2 in. dr, 0-175 lb-ft (item 74, Appx B)
REMOVAL
A
B
C
D
NOTE
Move vehicle so that track shoe to be removed is off the
ground, either between the roadwheel and the idler
wheel or between the drive sprocket and the front
roadwheels.
NOTE
Locking hardware is designed for one time use only.
All self-locking fasteners must be replaced upon
removal.
Decrease track tension (p 8-8).
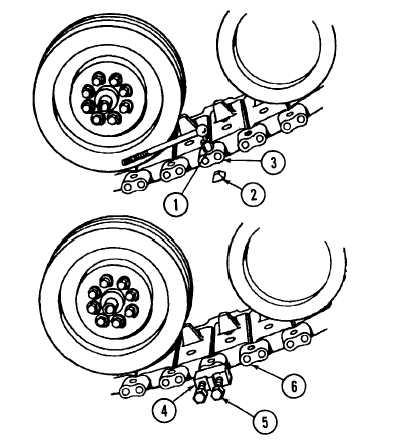
Remove four bolts (1) and retaining wedges (2) from four end connectors
(3). Discard bolts.
Install end connector puller (4).
Tighten two screws (5) against ends of track link pins (6).
NOTE
Tighten until connectors move outward approximately
1 inch.
8-3
Change 4
TM 9-2350-267-20