|
| |
TM 9-2350-287-34
12-3. APU GEARCASE REPAIR (continued).
22.
23.
24.
25.
26.
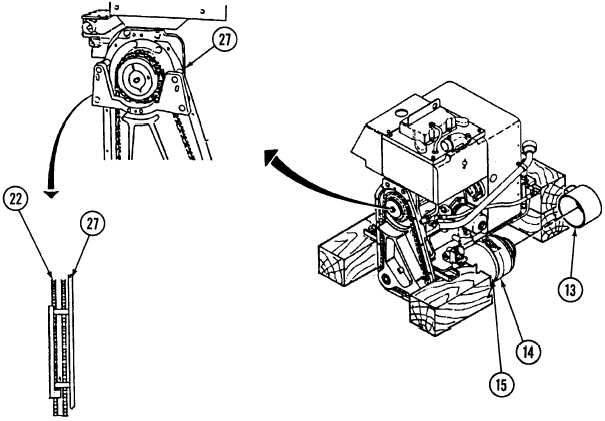
Pry out or tap in on drive sprocket (22) until alinement gage can be installed against machined surface of
housing (27).
Position alinement gage plate between two rows of drive sprocket (22) teeth, just touching rear drive sprocket
(22).
WARNING
Sealant adhesive can burn easily, can give off harmful vapors, and is harmful to skin
and clothing. To avoid injury or death, keep adhesive away from open fire and use in
a well-ventilated area. If adhesive gets on skin or clothing, wash immediately with
soap and water.
Apply sealant adhesive to threads of screw (16). Install screw (16), Iockwasher (17), and plate (18) on shaft
(19). Torque screw (16) between 50 and 55 ft-lb (68 and 75 N·m) with alinement gage held in position.
NOTE
Make sure alinement gage plate is not touching either row of teeth at this point.
If alinement of drive sprocket shifts perform steps 25 and 26.
Pry drive sprocket away from housing (27).
Repeat steps 23 and 24 if drive sprocket (21) alinement shifts.
27.
Install air duct (13) on generator (15) and secure with strap (14).
12-15
|