|
| |
TM 9-2350-287-20-2
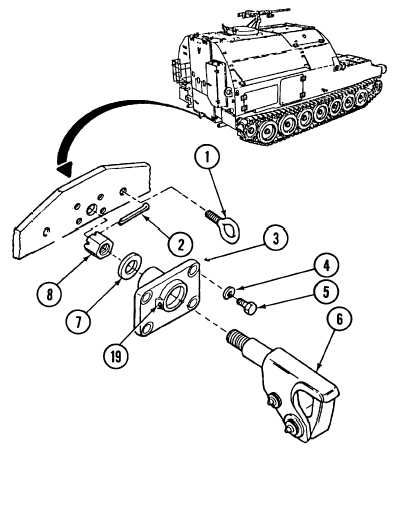
13-2. TOWING PINTLE REPAIR (continued).
e.
1.
2.
3.
4.
5.
6.
7.
8.
9.
INSTALLATION
Coat threads and shaft of pintle body (6) with grease.
Install pintle body (6) on bracket (3).
CAUTION
Do not overtighten slotted nut. Pintle body must rotate freely in bracket. Failure to
heed this caution may result in damage to pintle body or bracket.
Install bearing (7) and slotted nut (8) on pintle body (6). Tighten slotted nut (8) only enough to take up any
space between bearing (7) and bracket (3).
Back off slotted nut (8) until hole in shaft of pintle body (6) alines with slots on slotted nut (8).
Install new cotter pin (2) in slotted nut (8).
Install bracket (3) on rear of vehicle with four screw (5) and new Iockwashers (4).
Apply grease at fitting (19) to fill bracket (3).
WARNING
Sealing compounds can
burn easily, can give off
harmful vapors, and are
harmful to skin and
clothing. To avoid injury
or death, keep away from
open fire and use in a
well-ventilated area. If
sealing compound gets
on skin or clothing, wash
immediately with soap
and water.
Coat threads on two eyebolts (1) with sealing
compound.
Install two eyebolts (1 ) in rear of vehicle.
FOLLOW-ON MAINTENANCE:
• None
13-5
|